I'm back. Did you miss me? I missed me, my home and my kiddos (furry kids included) but I really enjoyed the last two trips that I just returned from. And while on the first trip, I was inspired to create this recipe while in the airport waiting to fly home. Yes, inspiration comes from everywhere and that was the point of the very first trip I took so let me explain.
Last year I won a contest with the Duncan Hines, a Pinnacle Food company. I created a quick and simple recipe but it was packed with flavor. Even though Duncan Hines has lots of vegan foods, this particular recipe is not but it you'd like to check it out, it's called the "Holy Spumoni Cake" and it's on
www.duncanhines.com. With this big win, I won a trip back to New Jersey and was cooking with their Chef, Chef Joe who did some of his formal training in France. It was an amazing trip and it was absolutely life changing and a once in a lifetime thing. So I thought. Then at the beginning of this year, Duncan Hines contacted me again and asked if I'd like to come to New Jersey once again, their treat, and they had some really exciting things planned along with 8 hours of pastry making, baking, science in foods, cooking and decorating classes. Oh my gosh was I in heaven. Chef Joe taught us you can be inspired by anything and took look at trends, new flavors, vintage flavors...pretty much everything for inspiration too. I most definitely know how something can inspire because our local grocery store had run out of spumoni ice cream and that was the reason the spumoni recipe above simply popped into my head. Now, I am an inspiration junkie. My new hobby is spending my days looking for something to inspire.
While in New Jersey, I was able to extend my trip for an additional week and my hubby flew in to meet me. I decided that we should do a foodie tour from New Jersey to Maine and back. The whole trip I was looking for the foods and flavors of the New England states, and tried to get familiar with their way of life. It was completely amazing and because of this trip I am once again transformed. So enough about this and let's get baking...
Citrus Burst Vegan Cheesecake
Recipe~
( Broken down into sections)
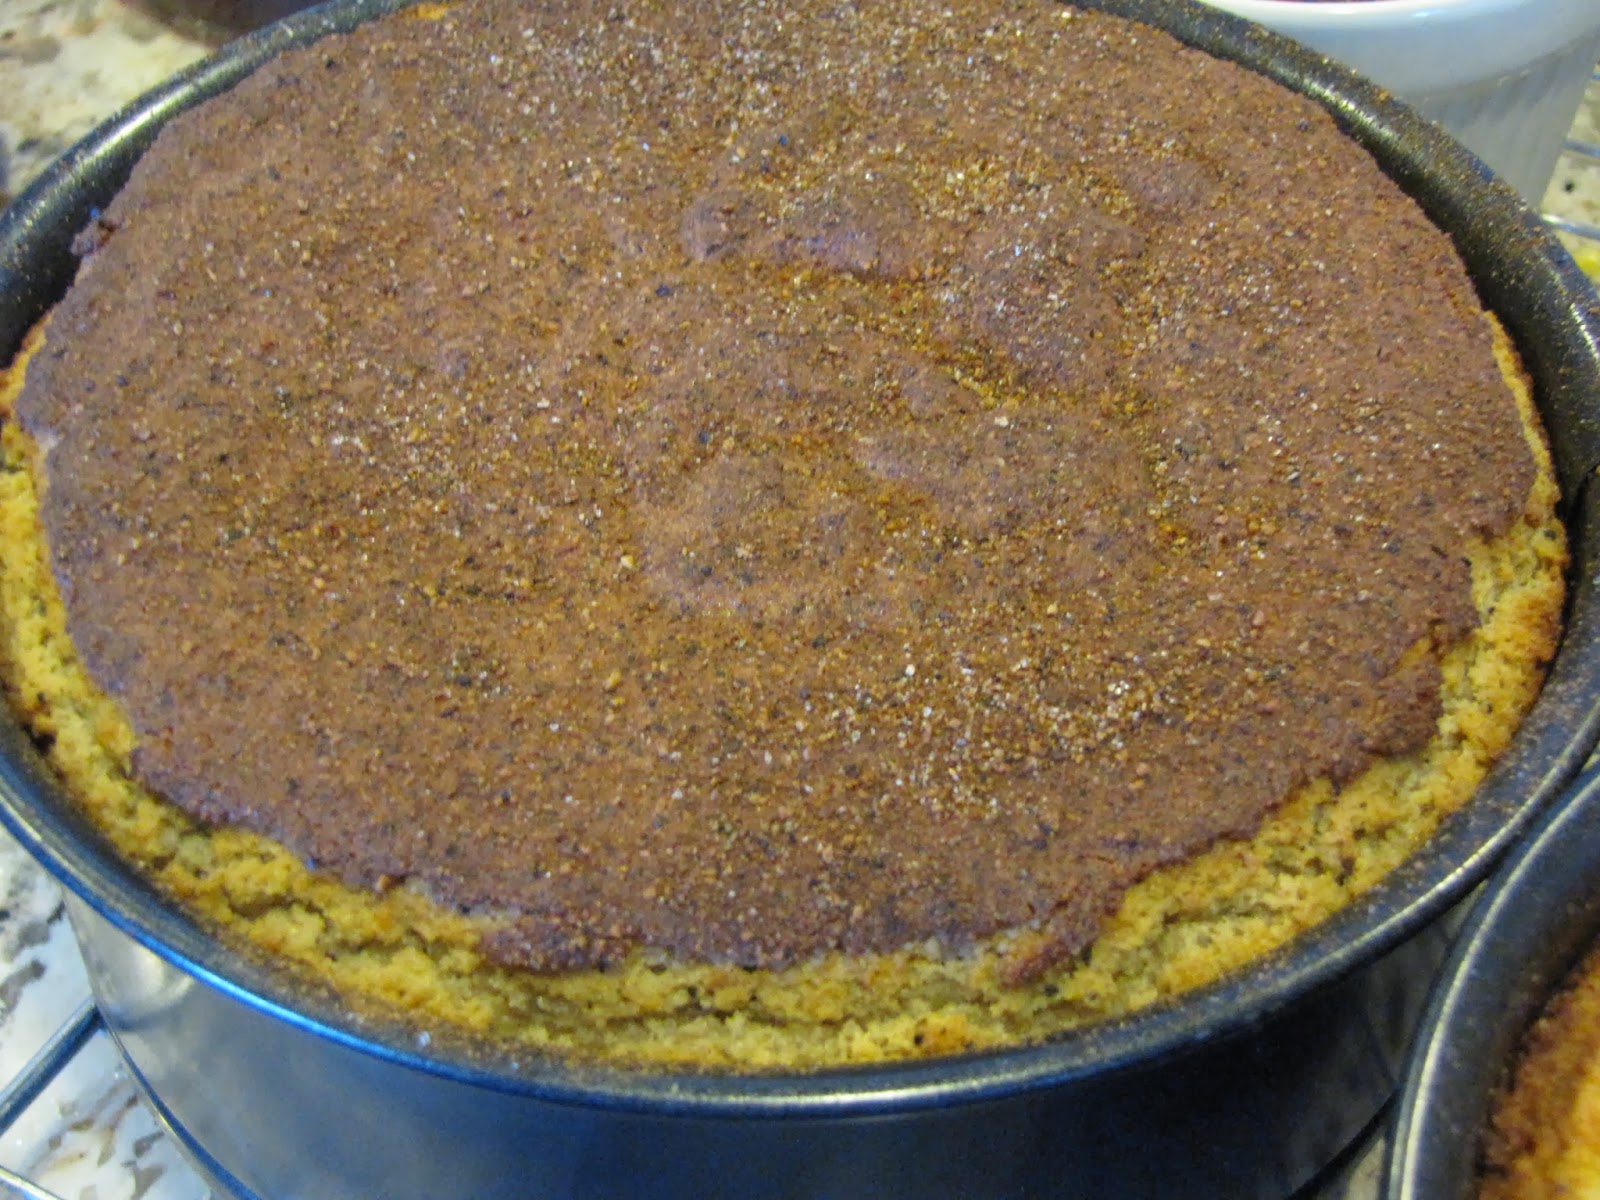
Crust~
2 c. Pecans (but feel free to use your favorite nut meat. I envision a wonderful macadamia nut crust in the future too.)
1 tsp ginger powder
15 dates
Food process nuts and ginger powder until chopped, but not too fine. Add dates and process until mixture comes together and dates are processed. Pour and press into a greased 8-9 inch spring form pan or two 6 inch greased spring form pans. Set aside.
Filling~
1 stick vegan butter
1/2 c. flour
Over medium heat on stove, melt butter and add flour while stirring constantly. Turn up heat to high and stir while cooking for 4 minutes. Set aside and cool.
2 1/2 c. soaked and drained cashews (soak overnight and drain)
12.3 oz soft tofu
Zest from 1 lime, 1 orange, 1 grapefruit and 1 lemon ( save these fruits for juice to make syrup)
2 Tbs lime juice
3/4 c. agave nectar ( I used the dark nectar)
1 tsp vanilla
1/4 c. cream from the top of a can of coconut milk ( tip* leave can in fridge, opened overnight for a nice thick cream)
In a food processor, process all ingredients above until cashews are nice a smooth. While processor is still processing, add flour/ butter mixture in and mix until incorporated.
1/2 tsp baking powder
1 tsp corn starch
Add baking powder and corn starch to food processor and mix until incorporated. Pour into prepared crusts. Bake for 20 minutes at 400 degrees then turn down oven to 350 degrees for 20-25 minutes until set up and light brown on top. Check center with tooth pic to make sure it's done. Cool.
Drizzle~
Juice from all left over fruits
Granulated sugar
Cornstarch
To make Drizzle, squeeze juice from the remainder of the fruits and cook in a pot on med-high heat. Add 1 Tbs of sugar, stir and taste. If it's not sweet enough for your taste, add 1 Tbs more and repeat until it's your level of sweet that you like. ( Be careful not to burn your tongue while tasting.) In a small cup, add a little of the cooked mixture to 1 tsp of cornstarch and mix. Add that back into the hot pot and stir until it gets thick. Depending on the size of your fruits and the amount of juice they produce, you may have to add another tsp of cornstarch to thicken it. You want this to be a thick drizzle, not too wet and not too thick. Let it cool slightly and drizzle your slices of cheesecake right before eating.
Follow this blog to Stay Tuned in for other cheesecake recipes like~ Pumpkin Cheesecake Swirl, Peanut Butter, Berry and Oreo Cheesecakes too.
Enjoy and Happy Eating...
My Inspiration trip at Duncan Hines. Forever inspired, forever grateful and forever a baking, cooking and eating fanatic....
(Can you find me? Hint~ Third in from the right, flip flops and capris)